
Every fall we get the same phone call, and every spring we get its sequel. In October it sounds like this: the outside tap keeps dripping, is that a problem? In April it sounds like this: I turned on the garden hose and now there is water running down my basement wall. Both calls are about the same fixture, the hose bib, and most of them could have been avoided with ten minutes of work before the first hard freeze.
A hose bib is the outdoor faucet on the side of your house, sometimes called a spigot, sillcock or outside tap. Below, a licensed Toronto plumber walks you through how to find where yours is leaking, which fixes you can safely do yourself, and when it is time to call a pro.
First, Figure Out Which Kind of Hose Bib You Have
Before you pick up a wrench, look at the faucet and at the pipe behind it inside the house. Toronto homes have two main types:
- Standard (compression) hose bib. Short body, the valve sits right at the outside wall. Common in older homes in East York, Scarborough, Etobicoke and most of the pre-1990s housing stock. It must be shut off from inside and drained every winter.
- Frost-free hose bib (sillcock). Longer body, with a stem that reaches 8 to 14 inches into the heated part of the house, so the valve closes where it cannot freeze. Most homes built or renovated since the 1990s have one. Newer models usually have a vacuum breaker cap on top to stop garden-hose water from being siphoned back into your drinking water.
Now find the interior shut-off valve. It is usually on the basement ceiling or in a utility room, on the pipe heading toward the outside wall. If you cannot find one, that is worth knowing before winter, and it is one of the first things we check on a service call.
Where Is It Leaking? Five Common Leaks and Their Fixes
1. It drips from the spout when it is turned off
This is the classic leaking hose bib. On a standard bib, the rubber washer at the end of the stem has hardened or split and no longer seals against the seat. On a frost-free bib, it is the same idea, the seat washer just sits at the far end of a long stem inside the wall.
The fix: shut off the interior valve, open the outside faucet to drain it, then loosen the packing nut behind the handle and unscrew the whole stem. Replace the washer with one of the same size and shape (take the old one to the hardware store), and on a frost-free bib, use the stem kit that matches the brand. Reassemble, open the interior valve slowly and check for drips. If the brass seat inside the body is pitted, a new washer will not seal for long and the bib should be replaced.
2. Water leaks around the handle when the tap is open
The packing around the stem has worn down. Snug the packing nut a quarter turn clockwise with the water running. If that does not stop it, shut the water off and replace the packing washer or wrap new graphite packing string around the stem under the nut. Do not crank the nut hard, it only makes the handle stiff and cracks old brass.
3. It spits from the top when a hose is connected
A short burst of water from the vacuum breaker when you turn the tap off is normal. A steady spray while the hose is running means the vacuum breaker is worn. Replacement caps and rebuild kits are inexpensive. Do not remove the vacuum breaker to stop the spray. It is there to protect your drinking water from back-siphonage.
4. It leaks at the hose connection
The easiest fix of the bunch. The rubber hose washer inside the hose coupling is flattened or missing. Replace it, and the leak is gone. If the threads on the bib itself are damaged, a hose bib thread repair kit or a new faucet is the answer.
5. Water shows up inside the house when you turn it on
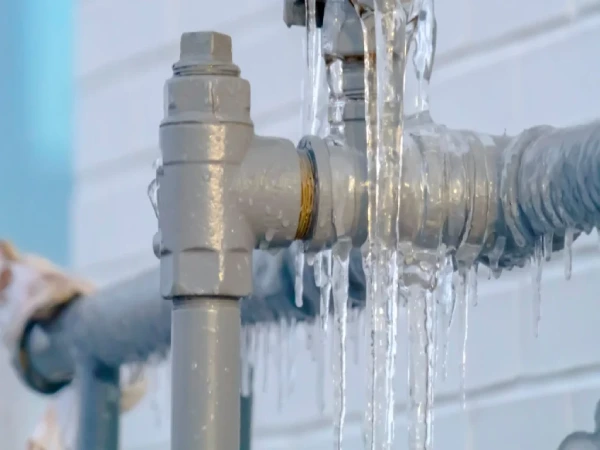
This one is not a DIY fix. If the tap seems fine when it is off but water appears on your basement wall, ceiling or rim joist as soon as you open it, the pipe has almost certainly split inside the wall. It happens most often to frost-free bibs that were left with a hose attached over the winter: the hose traps water in the long stem, the water freezes, and the pipe bursts where you cannot see it. You only find out in spring, the first time you water the garden.
Close the interior shut-off right away and call a plumber. The bib has to be replaced, and the wet framing and insulation behind it need to be checked. Our frozen pipe repair team handles these every spring, and if you are not sure where the water is coming from, leak detection finds it without opening up more wall than necessary.
How to Winterize Your Hose Bib Before a Toronto Winter
Toronto regularly sees nights well below minus 15°C in January and February, and a cold wind off Lake Ontario finds every exposed pipe. Late October to mid November is the right time to do this:
- Disconnect every hose. This is the single most important step, even on a frost-free bib.
- Close the interior shut-off valve for each outside tap.
- Open the outside faucet and let the water drain out. Leave it open for the winter so any water left in the line has room to expand.
- Open the small bleeder cap on the interior valve, if it has one, with a bucket underneath, then close it again.
- Add an insulated faucet cover on older standard bibs, especially on north-facing walls and in exposed spots like garages and back additions.
If the interior valve will not turn, drips when you close it, or does not exist, do not force it. A seized valve that snaps in your hand turns a fall chore into an emergency. That is a quick job for a plumber, and it is far cheaper in October than in February.
When to Call a Plumber Instead
Changing a washer is a reasonable Saturday job. These are not:
- Water inside the wall, on the basement ceiling or on the rim joist
- No interior shut-off valve, or one that is seized or leaking
- The bib is loose and the copper pipe behind it twists when you turn the handle
- You want to replace an old standard bib with a frost-free model, which means cutting into the wall, connecting to the supply line and sealing the opening properly
- The same leak keeps coming back after you have replaced the washer
Replacing a hose bib is usually a short visit when the pipe is reachable from an unfinished basement. Finished ceilings and walls take longer, and you get a written price before we start either way. If water is actively running into the house, treat it as an emergency: close the main water shut-off and call our 24/7 emergency plumbers.
Frequently Asked Questions
Why does my outdoor faucet drip when it is turned off?
In most cases the rubber seat washer at the end of the stem is worn or the brass seat it presses against is pitted. Replacing the washer fixes most drips. If the seat is damaged, the hose bib should be replaced.
Should I turn off my outside water in winter in Toronto?
Yes. Close the interior shut-off valve, disconnect the hose and leave the outside faucet open to drain. Do this every fall, even if you have a frost-free hose bib.
How do I know if my frost-free hose bib burst?
The tap looks normal when it is off, but water appears inside the house, on the basement wall, ceiling or rim joist, as soon as you turn it on. Close the interior valve and call a plumber.
Can I replace a hose bib myself?
Swapping a washer or packing is a reasonable DIY job. Replacing the whole bib means cutting into the wall, connecting to the supply pipe and sealing the opening against air and water, so most homeowners are better off having a licensed plumber do it.
Need a Hand With Your Outdoor Faucet?
Rooter Brothers is a licensed, family-owned team of drain, sewer and plumbing specialists serving Toronto and the GTA. Whether it is a dripping spout this fall or water on the basement wall next spring, a real person answers at (647) 449-5665, 24 hours a day, and you get a written price before any work starts.